

 Login
Login

 December 10, 2025
|
Voiced by Amazon Polly |
Introduction
Upgrading legacy Java applications, especially from Java 8 or 11, can be slow, risky, and full of dependency issues. Amazon Q Developer’s Code Transformation feature changes that by automatically analyzing your codebase, updating POMs, adjusting APIs, and generating upgrade-ready patches directly inside your IDE. Using VS Code, Maven (3.8+), and the required JDK versions, you can move applications to modern JDKs like Java 17 or Java 21 with far less manual effort and more predictable results.
We will walk you through the setup, configuration, and step-by-step procedure to transform a Java 8 project into Java 21 using Amazon Q, from preparing the environment to reviewing and applying the upgrade patch.
Pioneers in Cloud Consulting & Migration Services
- Reduced infrastructural costs
- Accelerated application deployment
Prerequisites
- Visual Studio Code
- Amazon Q (pro subscription is recommended)
- Maven Version greater than or equal to 3.8
- xml and .java files must be present in the project directory
- Ensure a Maven wrapper (mvnw/mvnw.cmd) is in your project root for Amazon Q to use. If you aren’t using a Maven wrapper, install Maven.
- Maven Installation: see Installing Apache Mavenin the Apache Maven documentation. After installing Maven, add it to your PATH variable (check here How do I add Maven to my PATH?).
- You need to download the JDK versions that match both your source code version and your target version, as shown in the table below. For example: Java 8 → JDK 8, Java 11 → JDK 11, and target versions Java 17 or Java 21 → JDK 17 or JDK 21.

Install & Set up the Amazon Q Developer extension or plugin in your IDE
To set up Amazon Q Developer in your integrated development environment (IDE), complete the following steps. After installing the Amazon Q extension or plugin, authenticate through AWS IAM Identity Center or AWS Builder ID. You can use Amazon Q for free without an AWS account by authenticating with a Builder ID.
Amazon Q can currently be set up in four IDEs. The links below include setup instructions using IAM Identity Center or Builder ID, along with the minimum supported versions for each.
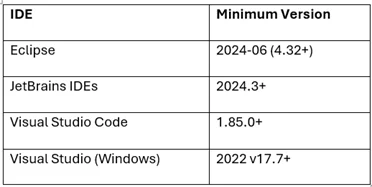
- Eclipse – Link to setup: Eclipse-Link
- JetBrains IDE – Link to setup: JetBrains-IDE
- Visual Studio Code – Link to setup: Visual Studio Code
- Visual Studio (Windows) – Link to setup: Visual Studio for Windows
Note: Generally, the default session duration for one authenticated through AWS IAM Identity Center is 8 hours. However, in the case of Amazon Q, the default session lasts 90 days
Upgrading Java application version using Amazon Q and AWS Transform
- Install & Setup JDKs in Windows
- We are going to install JDK 8 and JDK 21, since we are transforming the Java application version from Java 8 to Java 21.
- Download JDK 8 and JDK 21 (for Windows versions) from the links Java-SE-8-Oracle and Amazon Corretto JDK 21. Install both of them on your local Windows machine.
- Setup Maven
- Amazon Q supports the Maven version from 3.8 and later
- Under the “Files” section, download the latest version of Apache Maven. Look for the binary zip archive Apache-Maven.
- Extract the Zip to a location C:\Program Files\apache-maven-{version}.
- Set up the Maven path in Environment Variables.
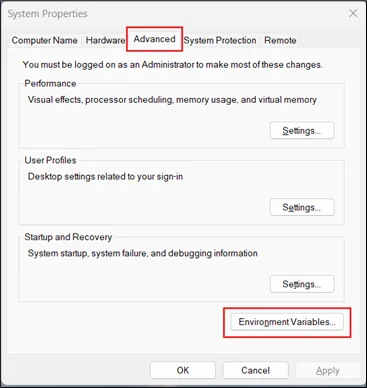
- Open the Start Menu, search for, and open ‘Edit the system environment variables’.
- Go to the Advanced tab and click on Environment variables.
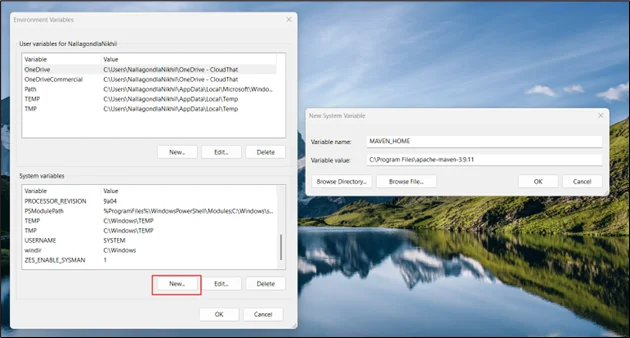
- Click on New under the System Variables Add the following below. Variable value should be your Apache Maven Installation folder or directory location. Then Click Ok
- Variable Name: MAVEN_HOME
- Variable Value: C:\Program Files\apache-maven-3.9.11
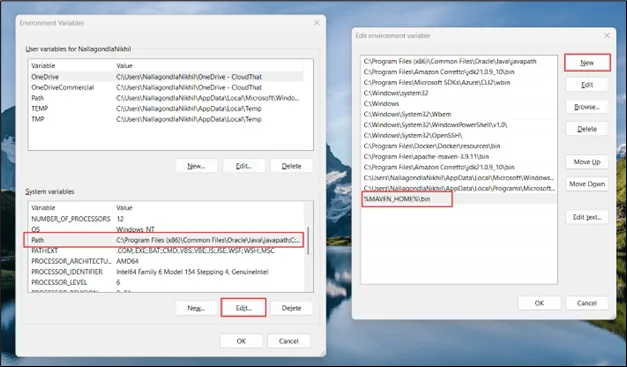
- Under the System Variables section, click on Path and edit it.
- Click on New add %MAVEN_HOME%\bin, click Ok, again Ok, and save the path.
- Testing Apache Maven, open Terminal and type mvn -v, you can see the Apache Maven Version.

3. Set up Visual Studio with Amazon Q
- Open Visual Studio, then install the AWS Toolkit and Amazon Q plugins in the Extensions Tab. You can see Amazon Q Tab on the left side menu, click it
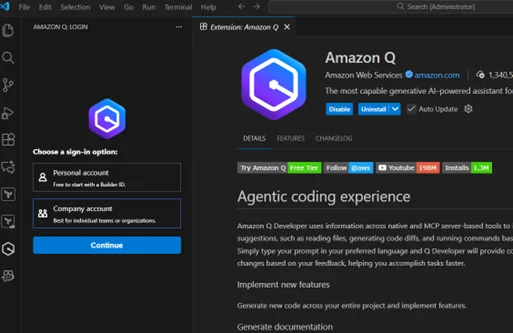
- Select the Company account to authenticate through AWS IAM Identity Center (If you are authenticating through Builder ID, use Personal Account).
- Provide the Start URL and select the Region as ap-south-1, then continue.
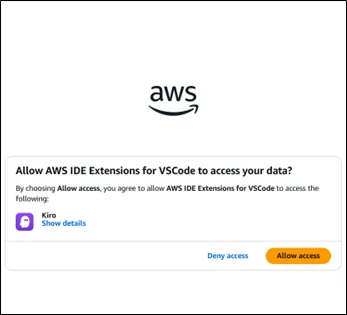
- Open the link and click Allow Access. You can see chat in VS Code.

4. Procedure to Upgrade a Java application from JDK 8 to JDK 21
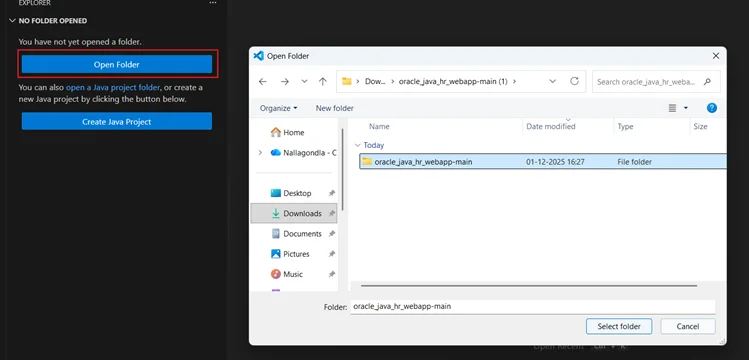
- First, clone the Java application on your local machine and extract it into a folder. Example: a Java application https://github.com/aws-samples/aws-appconfig-java-sample.
- Open the Explorer tab in Visual Studio, click on Open Folder, and select
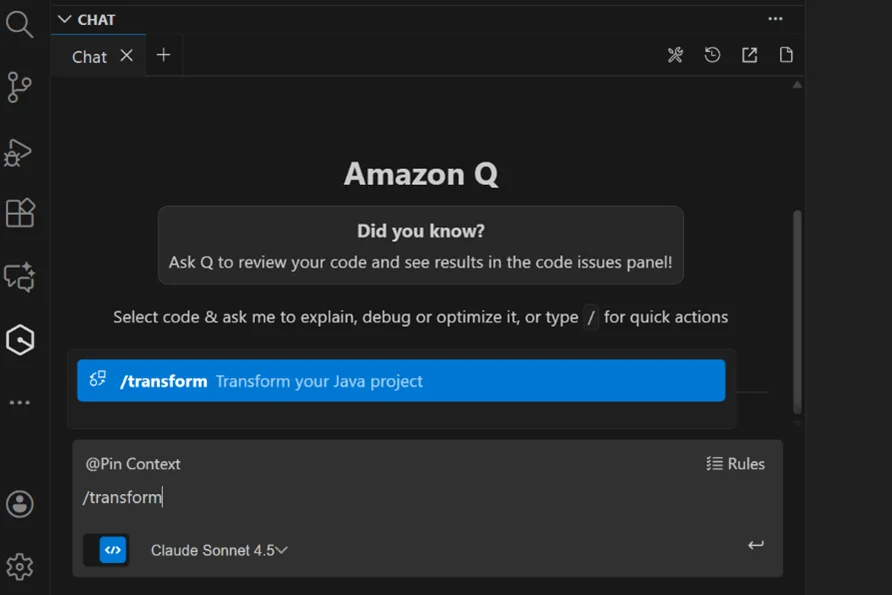
- Go to the Amazon Q tab on the left menu, type /transform, Select Action Item pop-up as /transform-Transform your Java project in the Amazon Q chat.
- Enter language upgrade in the chat and press Enter. Choose the project that you want to transform. Select Source Code Version as 8 and Target Code Version as 21 & click on the confirm option.
- Next, select ‘Skip unit tests’ (if not required) and confirm. Click on Continue without this (skipping dependency upgrade Yaml file).
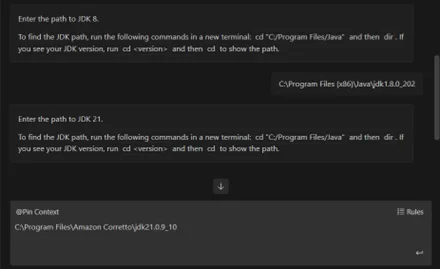
- Enter JAVA_HOME paths when prompted:
- JDK 8 → C:\Program Files (x86)\Java\jdk1.8.0_xxx
- JDK 21 → C:\Program Files\Amazon Corretto\jdk21.x.x.
- Wait for a short time, and the transformation of your code will begin.
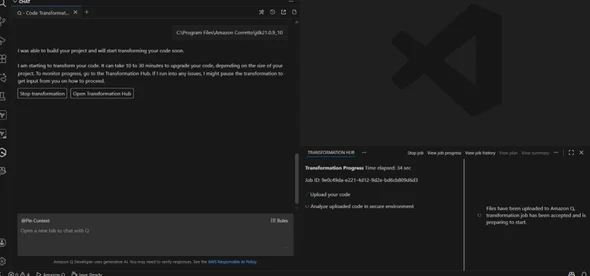
- In the Transformation Hub, you can view progress and display the transformation plan in a new tab.
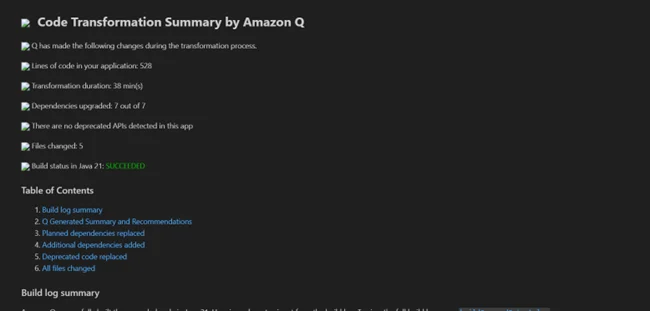
- Your project will be built in 55 minutes or less.
- You can see what files changed, summary, etc
5. Test the Upgraded Application:
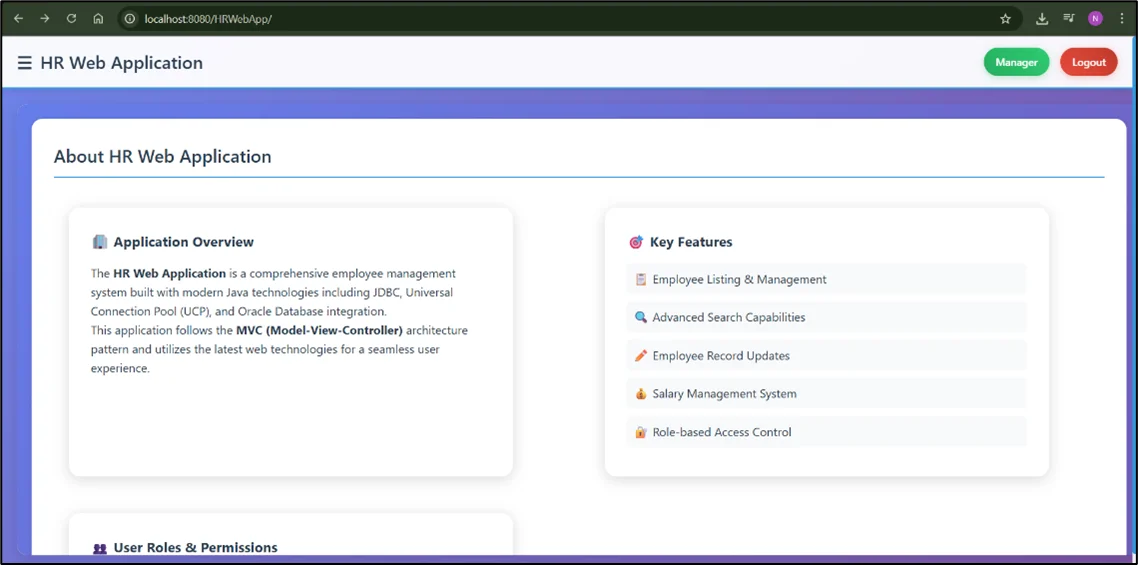
- Run mvn package, and it will generate a WAR file in the target folder. Copy the war file.
- You need to install the Tomcat server in Windows. Place the copied war file in the webapps folder. You can see it running successfully.
Conclusion
Using Amazon Q Developer’s Code Transformation makes Java upgrades far easier and more reliable.
Once changes are applied, you need to run tests and validate behavior to catch any edge cases that automation can’t handle.
Drop a query if you have any questions regarding Amazon Q Developer and we will get back to you quickly.
Empowering organizations to become ‘data driven’ enterprises with our Cloud experts.
- Reduced infrastructure costs
- Timely data-driven decisions
About CloudThat
FAQs
1. What should I do if I get the error "Too many active transformations running"?
ANS: – This happens when multiple jobs are still in progress or stuck in a failed state.
Fix options:
- Refresh or Stop jobs in Transformation Hub
- Re-clone your project into a new folder and try again
- Wait up to 12 hours for old jobs to expire
- If still blocked → raise an AWS support case with Job IDs
2. Can Amazon Q also upgrade my libraries and dependency versions?
ANS: – Yes, but it requires a second transformation. After upgrading to Java 17 or 21, start another transformation using: Source JDK = Target JDK = 21 (or 17→17) This triggers dependency + library upgrade automation on the already migrated codebase.

WRITTEN BY Nallagondla Nikhil
Nallagondla Nikhil works as a Research Associate at CloudThat. He is passionate about continuously expanding his skill set and knowledge by actively seeking opportunities to learn new skills. Nikhil regularly explores blogs and articles on various technologies and industry trends to stay up to date with the latest developments in the field.


Comments