

 Login
Login

 September 18, 2023
|
Voiced by Amazon Polly |
Overview
In the world of cloud-native applications, scalability and isolation are paramount concerns. When running multiple tenants or applications on a single Kubernetes cluster, you need a robust solution to manage resources, ensure security, and maintain performance.
Pioneers in Cloud Consulting & Migration Services
- Reduced infrastructural costs
- Accelerated application deployment
Introduction
The word “tenant” typically means a person or a group of people who use a specific area or thing. When we talk about Kubernetes, a tenant is a group of people, programs, or tasks that use the same resources in a Kubernetes cluster. These resources could be areas, containers, services, or other items in Kubernetes.
Need for Tenancy Concept
Kubernetes uses “Namespaces” to divide the cluster into separate, isolated sections. But when you want to do more complex things with multiple groups of users, it gets tricky because Kubernetes namespaces are flat, and you can’t easily share resources between namespaces that belong to the same group of users.
Loft
Loft is a convenient tool for setting up a Multi-Tenancy Architecture on any Kubernetes cluster. It offers a user-friendly interface (UI) and a command-line interface (CLI) for easy implementation. To learn more, visit Loft Labs.
Prerequisites
- A K8 cluster in Azure
Steps to install Loft on Windows
- Download the loft using the below command in the command prompt/powershell
|
1 2 3 4 5 6 7 |
md -Force "$Env:APPDATA\loft"; [System.Net.ServicePointManager]::SecurityProtocol = [System.Net.SecurityProtocolType]'Tls,Tls11,Tls12'; Invoke-WebRequest -URI "https://github.com/loft-sh/loft/releases/latest/download/loft-windows-amd64.exe" -o $Env:APPDATA\loft\loft.exe; $env:Path += ";" + $Env:APPDATA + "\loft"; [Environment]::SetEnvironmentVariable("Path", $env:Path, [System.EnvironmentVariableTarget]::User); |
2. Check for verification
|
1 |
loft --version |
Steps to create Multi-tenancy on the Azure K8 cluster
- Connect to the Azure K8 cluster as shown below

Note: Install Azure CLI and login before proceeding to this step.
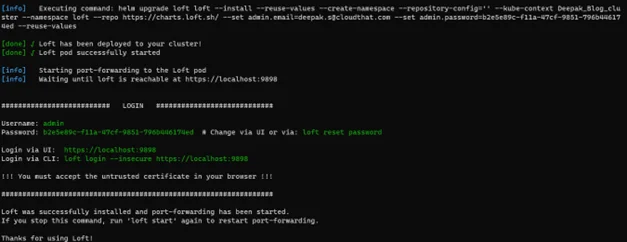
2. Start the Loft

3. Enter the Email of the admin who will handle the base cluster.

4. Credentials will be created and used for login.
5. Sign in page looks as below. Sign in using the previous credentials.

6. Configure the profile for the admin.

7. The Admin Portal looks as below.

8. Creating users
Let’s create four users and two teams here. The four users are:
- User-t1-u1
- User-t1-u2
- User-t2-u1
- User-t2-u2
The two teams are:
- team-1
- team-2
Let’s assume two different teams as two different tenants. A group of two users will be added to each team. The users in the team can access the resources of each other users and cannot use the resources of another team. To do so, let’s create two different virtual clusters and assign them to each team, which will be shown further. Below are the steps to create the users in the loft from the admin portal.

The following link will be generated for configuring the user.

Share the link with the user and configure the user as shown below.


9. Create the Team using the below procedure.

10. Below is the list of users and their respective team

11. Creating virtual clusters(vcluster-team-1) and assigning the users to clusters.

Select the Template

Give permission to the user to use the cluster.

12. Similarly, create vcluster-team-2
13. Now, there are totally three clusters.

14. Connect to vcluster-team-1 as shown below.

15. Copy the command shown.

16. Use in CLI

17. Verify the cluster

18. Now, this cluster has its namespaces.

19. Using the manifest file, let’s create pods, services, and deployment in this cluster.
Use the below yml file and save it with the name dem.yml
|
1 2 3 4 5 6 7 8 9 10 11 12 13 14 15 16 17 18 19 20 21 22 23 24 25 26 27 28 29 30 31 32 33 34 35 36 37 38 39 40 41 42 43 44 45 46 47 48 49 50 51 52 53 54 55 56 57 58 59 60 61 62 63 64 65 66 67 68 69 70 71 72 73 74 75 76 77 78 79 80 81 82 83 84 85 |
apiVersion: apps/v1 kind: Deployment metadata: name: azure-vote-back spec: replicas: 1 selector: matchLabels: app: azure-vote-back template: metadata: labels: app: azure-vote-back spec: nodeSelector: "kubernetes.io/os": linux containers: - name: azure-vote-back image: mcr.microsoft.com/oss/bitnami/redis:6.0.8 env: - name: ALLOW_EMPTY_PASSWORD value: "yes" resources: requests: cpu: 100m memory: 128Mi limits: cpu: 250m memory: 256Mi ports: - containerPort: 6379 name: redis --- apiVersion: v1 kind: Service metadata: name: azure-vote-back spec: ports: - port: 6379 selector: app: azure-vote-back --- apiVersion: apps/v1 kind: Deployment metadata: name: azure-vote-front spec: replicas: 1 selector: matchLabels: app: azure-vote-front template: metadata: labels: app: azure-vote-front spec: nodeSelector: "kubernetes.io/os": linux containers: - name: azure-vote-front image: mcr.microsoft.com/azuredocs/azure-vote-front:v1 resources: requests: cpu: 100m memory: 128Mi limits: cpu: 250m memory: 256Mi ports: - containerPort: 80 env: - name: REDIS value: "azure-vote-back" --- apiVersion: v1 kind: Service metadata: name: azure-vote-front spec: type: LoadBalancer ports: - port: 80 selector: app: azure-vote-front |

20. Check for verification.

21. Access the application using the load balancer IP

22. Change the cluster to vcluster-team-2, as shown below:

23. Check for namespaces, and this has its namespaces.

24. This cluster won’t be having the resources created in another cluster.

25. Let’s verify from UI
Below is the user-t1-u1 portal. Who has access to vcluster-team-1

This user can see the services created in the vcluster-team-1

26. Similarly, the user-t1-u2 can also see the services created in vcluster-team-1

27. Below is the user-t2-u1’s portal. Has only access to vcluster-team-2

28. This user cannot see the services created in another cluster.

By this way, isolation and Multi-tenancy can be achieved.
Conclusion
When many user or application groups need to share resources within a cluster while retaining isolation, Kubernetes’ multi-tenancy notion is essential. Loft offers a practical method for implementing multi-tenancy by building virtual clusters and efficiently handling resources. The blog clearly explains how to set up multi-tenancy on an Azure-hosted Kubernetes cluster using Loft, including managing users and teams, creating virtual clusters, and isolating resources.
Drop a query if you have any questions regarding Multi-tenancy in AKS, and we will get back to you quickly.
Making IT Networks Enterprise-ready – Cloud Management Services
- Accelerated cloud migration
- End-to-end view of the cloud environment
About CloudThat
FAQs
1. Can this technique be implemented on the K8 clusters, including managed clusters like Amazon EKS?
ANS: – Yes, this can be implemented on all the clusters.
2. What is the root-level partitioning mechanism employed by Loft to establish virtual clusters?
ANS: – Loft employs a “namespace isolation” feature to create virtual clusters at the root level. This allows Loft to isolate and manage different sets of resources within Kubernetes namespaces, effectively creating distinct virtual clusters within a single Kubernetes cluster.

WRITTEN BY Deepak S
Deepak S is a Senior Research Associate at CloudThat, specializing in AWS services. He is passionate about exploring new technologies in cloud and is also an automobile enthusiast.


Comments