

 Login
Login

 August 28, 2025
|
Voiced by Amazon Polly |
🌐 Introduction
In today’s fast-paced DevOps world, automation is the backbone of efficient software delivery. Two of the most powerful tools in the DevOps ecosystem are:
- Jenkins – an open-source automation server used for continuous integration and continuous delivery (CI/CD).
- Docker – a platform that allows you to develop, ship, and run applications inside containers.
While both tools are powerful on their own, combining them creates a robust pipeline for building, testing, and deploying applications seamlessly.
In this lab guide, we’ll walk you through the complete process of setting up Jenkins and Docker on an Azure Virtual Machine (VM) using automated scripts and cloud-init. By the end, you’ll have a ready-to-use CI/CD engine that’s cloud-native and production-ready.
Start Learning In-Demand Tech Skills with Expert-Led Training
- Industry-Authorized Curriculum
- Expert-led Training
🧠 Why Jenkins + Docker + Azure?
Before we dive into the technical steps, let’s understand why this setup is valuable:
🔸 Jenkins
- Automates code build, test, and deployment pipelines.
- Integrates with almost every DevOps tool.
- Open-source and widely adopted in the industry.
🔸 Docker
- Packages apps with all dependencies into portable containers.
- Eliminates “works on my machine” issues.
- Lightweight and fast to deploy.
🔸 Azure
- Offers scalable, on-demand infrastructure.
- Simplifies VM provisioning with CLI and templates.
- Excellent for Dev, Test, and Production environments.
Combining Jenkins + Docker + Azure allows you to build, test, and deploy containerized apps on the cloud in minutes.
🛠️ Lab Objectives
By the end of this lab, you will be able to:
✅ Create an Azure VM running Ubuntu
✅ Install Jenkins and Docker using a cloud-init script
✅ Open required firewall ports for SSH, Jenkins, and web apps
✅ Access Jenkins via web browser and complete initial setup
✅ Prepare the VM for running Docker-based pipelines
🧪 Prerequisites
Before starting, ensure you have the following:
- An active Azure Subscription
- Familiarity with Azure CLI and Cloud Shell
- Basic understanding of Linux commands, SSH, and DevOps tools
🧩 Task 1: Provision Azure VM with Jenkins & Docker (Automated)
✅ Step 1: Open Azure Cloud Shell
- Go to https://portal.azure.com
- Click the Cloud Shell icon (🖥️ >_) at the top.
- Choose Bash environment.
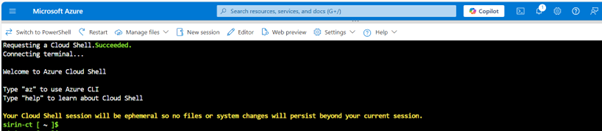
This gives you a ready-to-use terminal with the Azure CLI pre-installed.
✅ Step 2: Create Jenkins Auto-Install Script
Create a file named jenkins.txt with the following:
|
1 |
vi jenkins.txt |
Paste this cloud-init script to auto-install Jenkins and Docker:
|
1 2 3 4 5 6 7 8 9 10 11 12 13 14 15 16 17 18 19 20 21 22 23 24 25 26 27 28 29 30 31 32 33 34 35 36 37 38 39 40 41 42 43 44 45 46 47 48 49 50 51 52 53 54 55 56 57 |
#cloud-config package_upgrade: true runcmd: # Install Java - sudo apt install openjdk-17-jre -y # Add Jenkins repository and key - curl -fsSL https://pkg.jenkins.io/debian-stable/jenkins.io-2023.key | sudo tee /usr/share/keyrings/jenkins-keyring.asc > /dev/null - echo 'deb [signed-by=/usr/share/keyrings/jenkins-keyring.asc] https://pkg.jenkins.io/debian-stable binary/' | sudo tee /etc/apt/sources.list.d/jenkins.list > /dev/null # Install Jenkins - sudo apt-get update && sudo apt-get install jenkins -y - sudo service jenkins restart # Install Docker - sudo apt update -y && sudo apt install curl -y - curl -fsSL https://get.docker.com | sh # Add Jenkins and sirin user to Docker group - sudo usermod -aG docker jenkins - sudo usermod -aG docker jenkins # Restart Jenkins to apply group change (optional but helpful) - sudo systemctl restart jenkins <strong>💡 This script ensures Jenkins and Docker are installed on first boot using cloud-init, a standard for automating VM configuration on cloud platforms.</strong> |
Save the file using ESC + :wq!
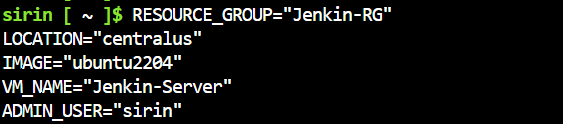
✅ Step 3: Set Environment Variables
|
1 2 3 4 5 6 7 8 9 |
RESOURCE_GROUP="Jenkin-RG" LOCATION="centralus" IMAGE="Ubuntu2204" ADMIN_USER="sirin" VM_NAME="Jenkin-Server" |
✅ Step 4: Create Resource Group and VM
Create a resource group:
|
1 |
az group create --name $RESOURCE_GROUP --location $LOCATION |

Now launch the VM and attach the setup script:
|
1 |
az vm create --resource-group $RESOURCE_GROUP --name $VM_NAME --image $IMAGE --admin-username $ADMIN_USER --generate-ssh-keys --public-ip-sku Standard --custom-data jenkins.txt |

⏳ This will take ~2–3 minutes. The VM will come pre-installed with Jenkins and Docker.
✅ Step 5: Open Firewall Ports
Allow Jenkins, SSH, and app port:
|
1 |
az vm open-port --resource-group $RESOURCE_GROUP --name $VM_NAME --port 8080 --priority 1010 |
|
1 |
az vm open-port --resource-group $RESOURCE_GROUP --name $VM_NAME --port 22 --priority 1020 |
|
1 |
az vm open-port --resource-group $RESOURCE_GROUP --name $VM_NAME --port 8082 --priority 1040 |
🔐 Task 2: Access and Configure Jenkins
🔍 Step 6: Get Public IP
|
1 |
az vm show --resource-group Jenkin-RG --name Jenkin-Server -d --query [publicIps] --output tsv |
🔗 Step 7: SSH into the VM
|
1 |
ssh <User_Name>@<VM_Public_IP> |
i.e ssh sirin@130.131.218.81
Or using Azure CLI:
|
1 |
az ssh vm --name $VM_NAME --resource-group $RESOURCE_GROUP |
⚙️ Step 8: Check Jenkins Status
|
1 |
service jenkins status |
🔑 Step 9: Retrieve Admin Password
|
1 |
sudo cat /var/lib/jenkins/secrets/initialAdminPassword |
Copy this password — it’s required for first-time web access.
🌍 Task 3: Web-Based Jenkins Setup
🌐 Step 10: Access Jenkins UI
Open your browser and visit:
|
1 |
http://<VM_Public_IP>:8080 |
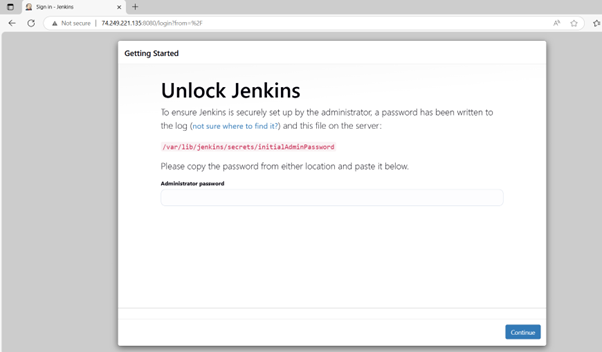
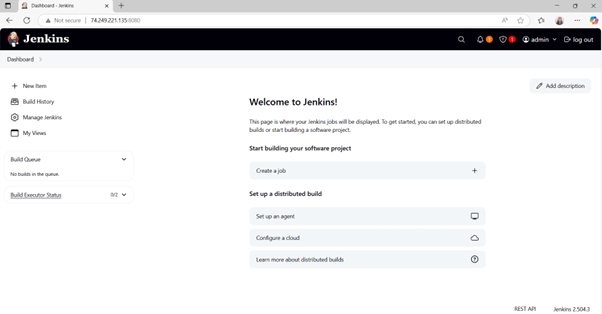
🛠️ i.e http://74.249.221.135:8080
You’ll see the Jenkins unlock screen. Paste the admin password retrieved earlier.
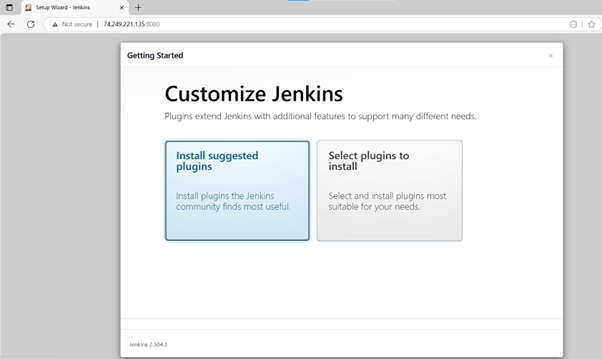
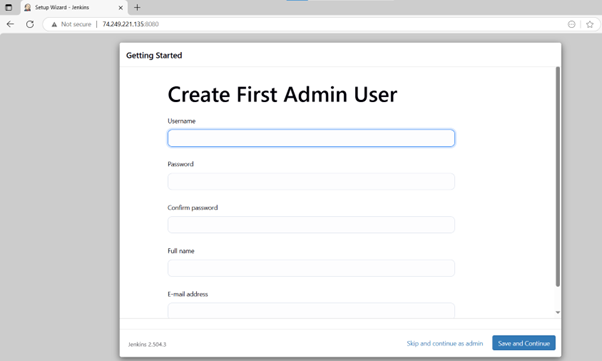
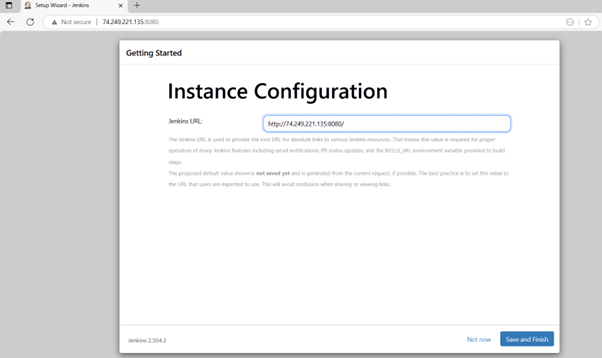
🛠️ Step 11: Setup Wizard
- Click Install Suggested Plugins
- Create your admin user
- Username: admin
- Password: yourpassword
- Full Name: Your Name
- Email: your@email.com
- Confirm Jenkins URL
- Click Start using Jenkins
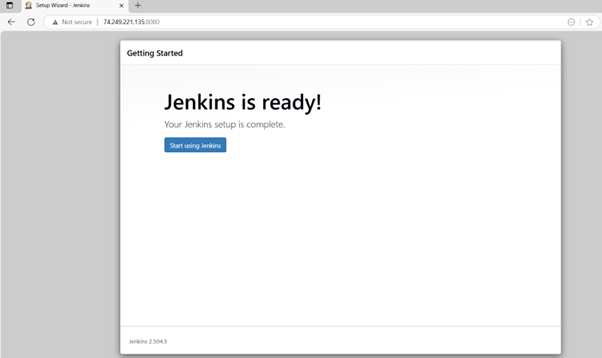
🎉 Jenkins is now ready for use!
📦 Jenkins + Docker = DevOps Powerhouse
Because Jenkins is now part of the docker group, it can run Docker commands — which is essential for:
- Building Docker images
- Running Docker containers
- Deploying containerized apps
You can now start building pipelines that run Docker commands inside Jenkins jobs!
🧠 Conclusion
You’ve now provisioned an Azure VM, automated the installation of Jenkins and Docker using cloud-init, and completed the initial Jenkins setup. With this foundation, you can start building powerful CI/CD pipelines that leverage containerization and cloud scalability.
This setup is not just a demo — it’s a practical starting point for real-world DevOps projects. As you continue, focus on expanding your skills in Cloud-Native DevOps to design and implement enterprise-grade solutions that scale seamlessly across modern cloud environments.
🚀 What’s Next?
🔧 Create your first Jenkins pipeline
🐳 Use Docker inside Jenkins jobs
📦 Push Docker images to Azure Container Registry (ACR)
⚙️ Integrate GitHub for CI/CD
Upskill Your Teams with Enterprise-Ready Tech Training Programs
- Team-wide Customizable Programs
- Measurable Business Outcomes
About CloudThat

WRITTEN BY Sirin Kausar Isak Ali
Sirin Ali is a seasoned corporate trainer and Subject Matter Expert with 11+ years of experience in cloud infrastructure, DevOps automation and Kubernetes. She has extensive real-time project experience in designing enterprise-grade CI/CD pipelines, automating containerized microservices deployments and implementing GitOps practices with advanced observability solutions. Skilled across diverse Kubernetes distributions, she brings hands-on expertise in transforming infrastructure and applications using industry best practices. Sirin has trained over 1500+ professionals worldwide and holds multiple certifications including CKA, Terraform Associate, Azure AI Engineer, GCP ACE, MCP, CCNA and MCT. Her practical, real-world approach simplifies complex DevOps concepts, empowering learners to confidently build production-ready solutions.


Comments