

 Login
Login

 July 11, 2022
Get. Set. Go! You need 3000 more steps to reach today’s milestone
Weekend Sale is Here! Fill your cart and get 25% off
08:09:24! Offer ends midnight
These are snippets of push notifications every one of us receives on our mobile phones. These notifications are thoughtful, funny, and insightful at best, luring us to open the application and check out the latest products. Business owners today have found new ways to increase viewership, drive traffic, and monetize with these timely messages, popularly known as Push Notifications.
Publishers and App owners use this tool to make impressions on their users by engaging and building customer relationships to generate high revenues.
Let us go through the technology that goes into creating these automated messages.
Introduction to Web Push Notifications
Web Push Notifications are notifications sent to the users to draw their attention to the activities happening in the web applications, even when using some other application.
In this blog, we will learn how to send push notifications to web applications using service workers in NodeJS applications.
- Cloud Migration
- Devops
- AIML & IoT
Service Worker API
Service workers act as proxy servers that connect web applications, browsers, and the network. They are used to create practical offline experiences, intercept network requests and take action based on whether the network is available or not, and update assets present on the server. They also support push notifications and background sync APIs.
Setting NodeJS Server
Here we will create a server using NodeJS and ExpressJS. So, we will install express in our application.
In this application, I will be using VS Code Editor. You can choose your IDE or Code Editor.
Step 1: Create your project directory, open the terminal, and navigate to the project directory. In your terminal, give the command npm init -y. It will generate a boilerplate for our NodeJS application.
Step 2: Next, we will install Express.JS using our application’s command npm i express.
Step 3: We will install nodemon, which restarts the NodeJS server every time there is a change in our code. nodemon detects the changes and restarts the server for you. In the terminal, write npm i -g nodemon.
Step 4: Finally, we will install the web-push dependency which triggers the message push from the backend via the Web Push protocol. n terminal write npm i web-push
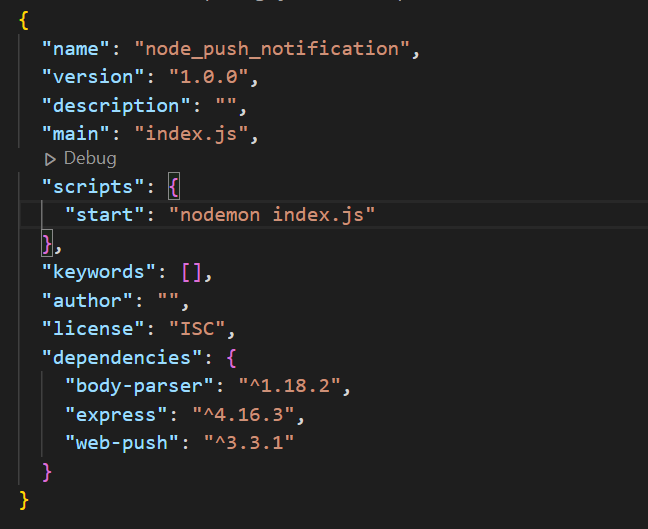
So, our package.json looks like this-
Step 5: Now, we will set up a basic ExpressJS server that will run our application on port 3000. In the root directory, create a file index.js

Generate VAPID Keys
In this section, we will see what the VAPID key is and will create it for our application.
The VAPID (Voluntary Application Server Identification) keys allow the Developer to send push notifications to the user without setting up a message service. They also help in identifying the user who is sending the push notifications.
To generate the VAPID keys in your terminal, use the command

It will generate a pair of VAPID keys; one is public, and the other one is a private key.

Note: VAPID keys will be different for different users.
Using VAPID Keys with Web Push
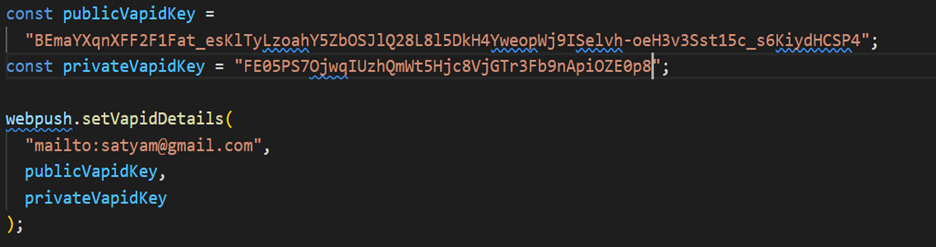
In the index.js file, we will store both keys in variables and call the setVapidDetails method of the web-push module.
Setting Up Subscribe Route
Now we will create a subscribe route where our client will send the POST requests. It will send notifications to the service worker.
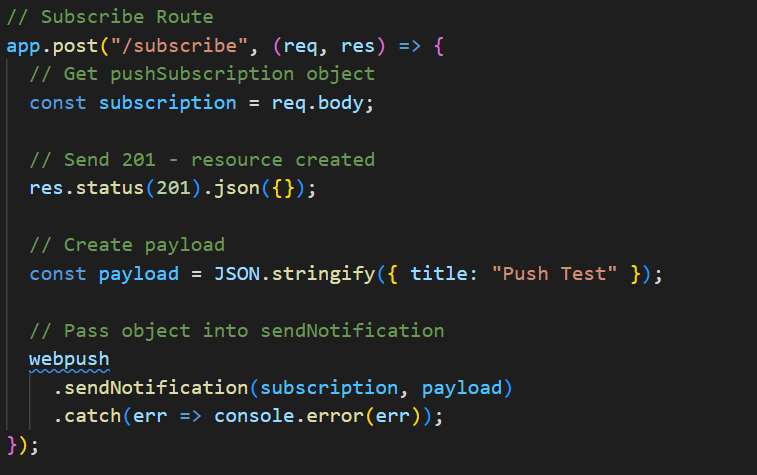
So, in this way, our web push server is completed.
Now we will create the client-side of the application form where we will POST our request to the server.
Creating the Client Side
We will create a client directory in the root folder. In this folder, we will create three files. The index.html will contain frontend code, and the client.js will have our client and a service.js for our service worker.
index.html

Client.js
In client.js file we will use public VAPID keys

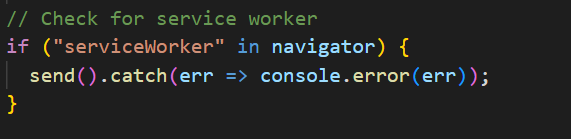
Next, we will check if a service worker is enabled or not in our current browser, and then we will trigger the send method
Now, we will create a send method that will register the Service Worker in our application; then, we register our push and trigger our send notification.
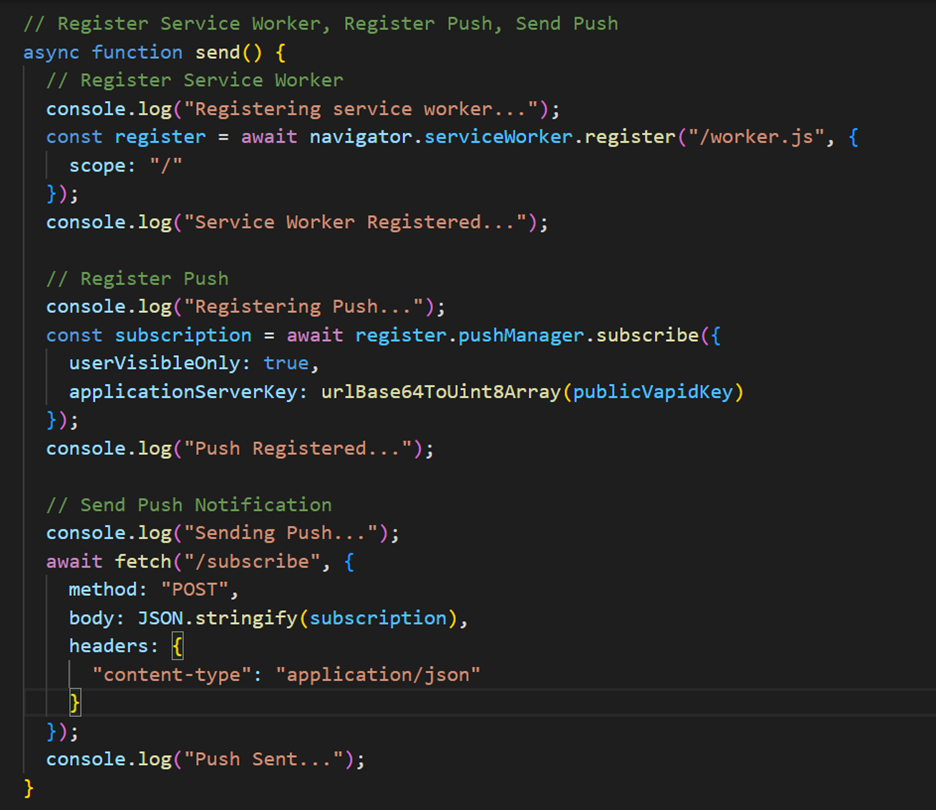
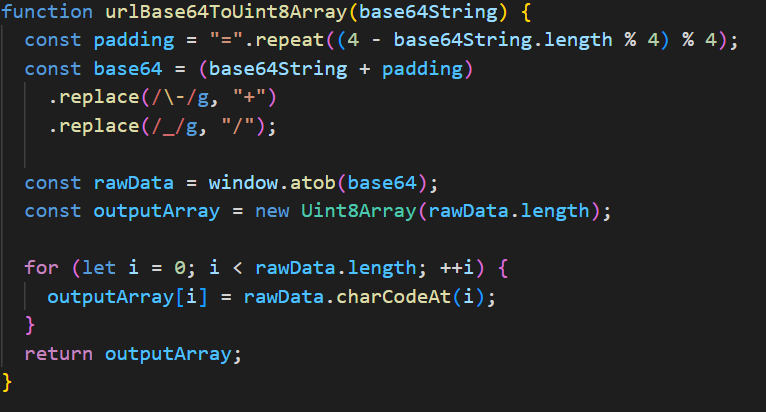
While registering the push, our applicationServerKey uses A Base64-encoded string containing an ECDCA P-256 public key that the push server will use to authenticate your application server. Thus we need to convert our VAPID keys to Uint8Array. We will create a function urlBase64ToUint8Array which will transform our Base64 VAPID keys to Unit8 Array.
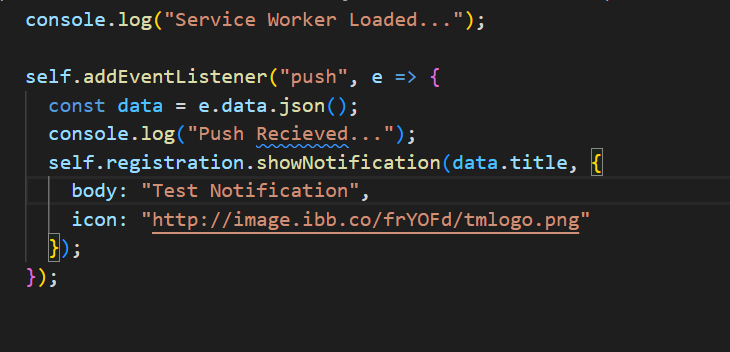
Worker.js
At last, we will create our worker.js file. We will attach an event listener to our push and create the content which we will send by push notification such as title, body, image, etc.
Test the Server
Now, we will start our application server by using the npm start command in the terminal.
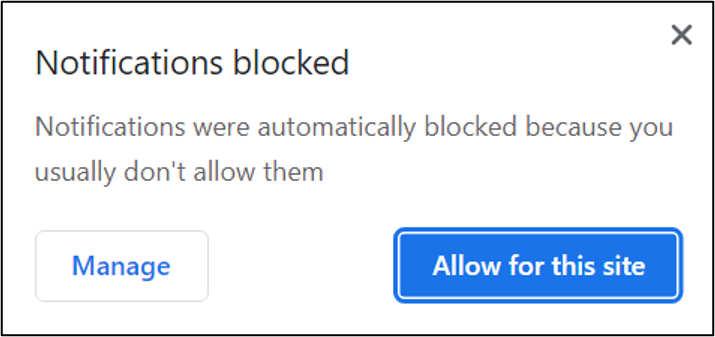
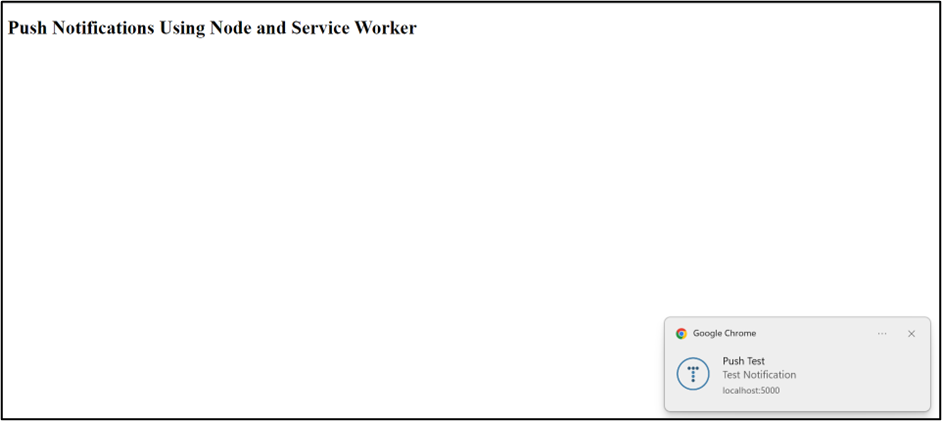
First, the client needs to allow the notifications. Our application will send push notifications every time we refresh our browser.
In browser
Conclusion
Today we have learned about implementing Web Push Notifications using Service Worker in NodeJS. Feel free to ask any queries you may have while working on the same, and I will be happy to help you solve them.
About CloudThat
CloudThat is the official AWS (Amazon Web Services) Advanced Consulting Partner, Microsoft Gold Partner, Google Cloud Partner, and Training Partner helping people develop knowledge of the cloud and help their businesses aim for higher goals using best-in-industry cloud computing practices and expertise. We are on a mission to build a robust cloud computing ecosystem by disseminating knowledge on technological intricacies within the cloud space. Our blogs, webinars, case studies, and white papers enable all the stakeholders in the cloud computing sphere.
CloudThat is a house of All-Encompassing IT Services on the cloud offering Multi-cloud Security & Compliance, Cloud Enablement Services, Cloud-Native Application Development, and System Integration Services. Explore our consulting here.
Get your new hires billable within 1-60 days. Experience our Capability Development Framework today.
- Cloud Training
- Customized Training
- Experiential Learning
FAQs
1. Where can I see the service worker in Developer's tools in the browser?
ANS: – You can see your Service Workers field in the Application tab of the Developer’s tools.
2. Why are notifications not popping in the browser window?
ANS: – You need first to allow the notifications because you usually don’t allow them.

WRITTEN BY Satyam Dhote


Anusha Shanbhag
Jul 12, 2022
Interesting topic. Thanks for posting